No way! You just used up the space on your second hard drive within a month. Can you explain why you don’t delete some photos to make some room? Excuse me? You don’t know how to do it because you can’t give up any of your shots? Well, but then don’t complain and run and compress them all to reduce their size! If you’re interested in this and if you’d like to learn more about this topic, I can explain to you how to go about it with this dedicated tutorial of mine.
In the following lines I’m going to show you how to reduce the size of a photo (in the sense of weight, not the size in millimeters, pixels or other units of measurement) using some special programs and online services. These are extremely effective tools and for the use of which it is not absolutely necessary to have a degree in computer engineering. All you have to do is select the photos you want to work on, click a couple of buttons and you’re done. What? Would you like to know if it is also available as a solution for the mobile front? Of course it’s available. At the end of the article you’ll find a section dedicated to the best apps in this category. Happy?
So? May I know what you are still doing there? Sit down in front of your computer (or, if you’re interested in mobile apps) grab your smartphone or tablet and read the instructions below. I’m sure that at the end you’ll be happy and satisfied with what you’ve learned and that even if you need it you’ll be ready to dispense useful advice to all your friends. Want to bet?
So? May I know what you are still doing there? Sit down in front of your computer (or, if you’re interested in mobile apps) grab your smartphone or tablet and read the instructions below. I’m sure that at the end you’ll be happy and satisfied with what you’ve learned and that even if you need it you’ll be ready to dispense useful advice to all your friends. Want to bet?
NXPowerLite (Windows/Mac)


The first step you need to take is to connect to the NXPowerLite website and click on the orange Download Now button located at the center of the page to download the program to your computer. Once the download is complete, double-click on the executable file and click on Yes/Run. In the window that opens click on Next, check the box for accepting the service usage minis and click on Next, then select Typical, click on Install and click on Finish to complete the installation process.
If you are using a Mac, once you open the download page of the program click on the Mac OS link at the bottom and then on the Download Now button. Once the download is complete, open the .dmg package that you obtained, double-click on the .pkg file attached to the window that appears on the desktop and follow the simple setup procedure that is proposed on screen.
Then, regardless of the operating system used, start NXPowerLite and click on the Add Files button in the upper left corner of the window to select the images you want to reduce the size of. Alternatively, you can drag and drop photos directly into the central part of the program’s screen. If you want to add a whole folder of images, click the Add Folder button in the upper left corner of NXPowerLite.
Then select, through the drop-down menu located next to the item Optimization Profile:, the type of optimization you want to apply to your photos by choosing between: Screen or Screen (without “merge”) (to view them on your PC), Print or Print (without “merge”) (to print them), Mobile (to view them on cell phones) or Custom (to set all the parameters yourself by clicking on the appropriate button next to it). Then click on Optimize to start the compression.
When the procedure is finished, you will see a new window indicating the degree of compression applied and you will find the “lightened” version of your photos in the same folder as the original files. You can recognize them by the suffix (NXPowerLite) in their name. If you prefer to make changes to the saving location of the compressed images and their names, before starting the above procedure click on the Edit… button next to the Saving Profile: item and select the options you consider most appropriate.
FILEminimizer Pictures (Windows)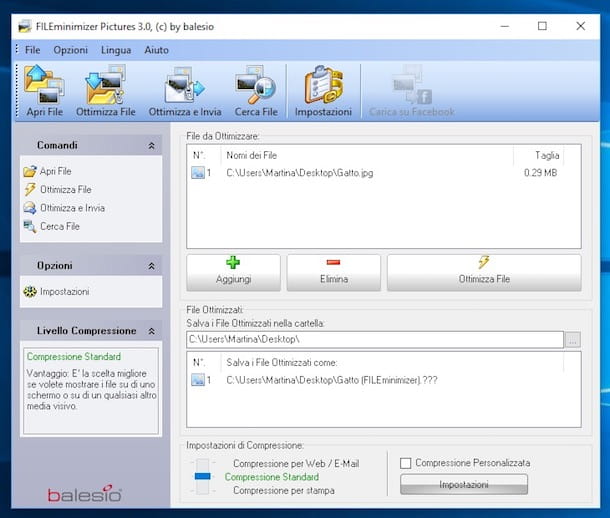
Looking for a viable alternative to the above program and are you using a Windows PC? Then use FILEminimizer Pictures. It is an excellent software completely freeware that allows you to reduce the weight of your photos without affecting the quality. It supports all of the popular image formats and is very easy to use.
You ask me how to use it? I will explain it to you immediately! First, go to the program’s website and click on the Download Free Version button at the bottom of the page. Wait for the software download to start and finish, then run the executable file and complete the setup by clicking Yes/Run, Next, check the box next to I accept the terms of the license agreement and click the Next button five times in a row. Finally, click on Install first and then Finish.
Now, wait a few moments for the program’s window to appear on your desktop and then click Open File and select the image you want to act on. Alternatively, drag the images directly into the FILEminimizer Pictures window.
Then indicate the type of compression you want to apply to the photos using the bar under the Compression Settings heading in the lower left corner. Depending on your needs and preferences you can choose between: Compression for Web/Email, Standard Compression and Compression for Print.
If you want, you can also perform a custom compression by checking the box next to the item Custom Compression, which is located at the bottom, clicking on Settings and acting on the available parameters attached to the window that will open as you see fit. To confirm any changes you have made, click OK.
Then click on Optimize File to start the actual process of reducing the size of your photos. You will find the compressed images in the same position as the original ones. If you want to access them “on the fly” click the View File button in the software window.
Then click on Optimize File to start the actual process of reducing the size of your photos. You will find the compressed images in the same position as the original ones. If you want to access them “on the fly” click the View File button in the software window.
TinyJPG (Online)
To use it, connect to the home page of the service and drag the images on which you want to intervene at the box marked Drop your .png or .jpg files here! which is at the top. You can upload up to 20 images at a time with a maximum weight of 5 MB each.
Wait for the upload of the selected images to start and then you’ll see the percentage of compression applied (both overall, at the bottom, and individually, next to the name of each file) and the total amount of space saved.
To download all of the compressed images, click on the Download all button at the bottom to save them to your computer or click on the Save to Dropbox button to store them on your Dropbox account (if you have one, of course). If you want to download the images individually, click on the download link next to the name of each file and you’re done.
JPEGmini (Online)

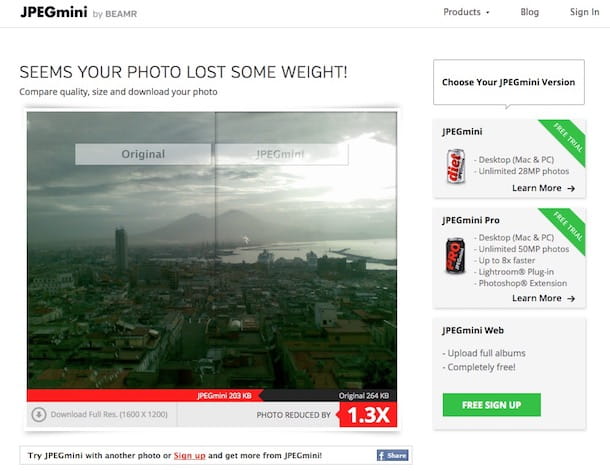
As an alternative to the above mentioned website, you can turn to JPEGmini which is able to reduce the weight of the images up to 5 times compared to the original one, without sacrificing the quality of the original file. It uses a proprietary technology that works without affecting the original quality of the shots. It is free, works with all web browsers but, unlike the above service, it “works” on images in JPG format.
To use it to reduce the size of a photo, connect to the home page of the service and click on the Upload photo button at the bottom left, click on the Press to Upload Photos button on the new web page and select the image you want to compress. Alternatively, drag the file directly into the browser window.
When the upload is completed, you will see a preview of the difference between the original and the compressed photo (practically nothing!), you will be shown how much the file has been reduced and the difference in weight between the original and the current image. To download the photo click on the Download Full Res. button on the bottom left and the download will start immediately.
App to reduce the size of a photo


As anticipated at the beginning of the article, to conclude I want to point out some useful applications that you can take advantage of right from your smartphone or tablet to reduce the size of a photo without having to go through the computer. You’ll find those that in my opinion represent the best of the category just below. Some are free, others are paid. Choose the one you think is best for you and download it now. Happy downloading!
Image Shrink Lite (Android) – A very good app that allows you to reduce the size of your photos in a simple and immediate way. You can choose from several presets and the operation is intuitive enough. Free.
QReduce: Shrink Photo Format (Android) – Another app in the category for reducing the size of images. It allows you to shrunk individual files as well as batch files, and also to share ZIP archives containing the shrunk files. It’s free.
Photoczip (Android) – App that does just one thing and does it great: it applies a default compression to selected images, saving the user the task of having to deal with the settings. Free.
Photo Compress (iOS) – An excellent application thanks to which you can reduce the size of images (all major formats are supported) offering the possibility of manually selecting the degree of compression. It also allows you to act on entire albums simultaneously. Download for free.